Introduction
So you want to build & host a Hugo powered website for FREE on Google's network? (Who doesn't..). Well, I aim to get you their without the pages of text.
Each section will also point you to an external resource from which you can find further information.
If you just want to know how to use Hugo Extended with Cloud Build and see an example build config, see part 4. Setting up Cloud Build for Hugo Extended and Example Build Config.
Sections
1. Walk-through Requirements
- A Google Cloud account
- A Hugo Site (or clone this example repo)
- A Domain Name (& Verified be with Google - we'll cover this below)
- (Optional for HTTPS) A Cloudflare Account
2. Setting up the Google Bucket
If you haven't already, Create a Google Cloud account.
Notice
Enable billing on your account (See How)! This enables features such as source control repos, it won't charge you.
1. Create bucket with the domain name of your site, e.g. "www.yoursite.xyz"
You can do this easily here: Open the Cloud Storage browser
Note
Make sure to set this as Public access.
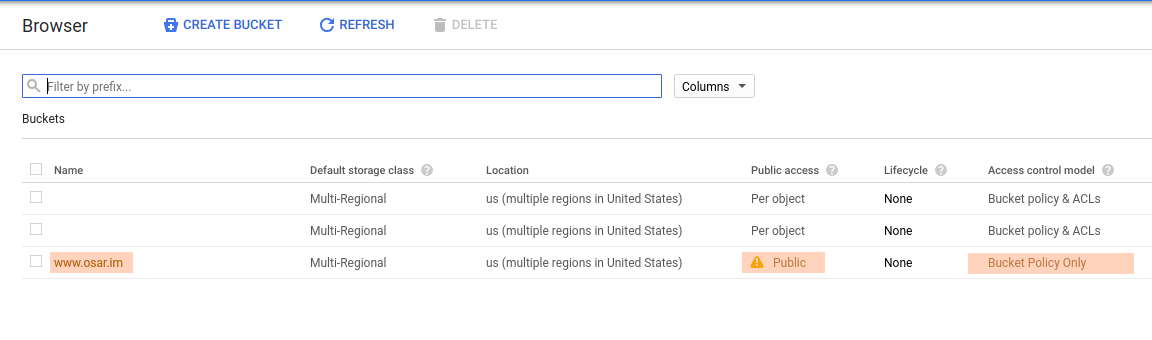
Bucket List Page
2. (Optional) Upload test page
If you want to test your DNS -> bucket connection, just upload an index.html file to your bucket.
Open your bucket here: Open the Cloud Storage browser
For in-depth information, see the following guide: Google - Hosting a static website
3. Setting up Hugo
For the most up-to date info, see: Hugo - Getting Started
1. Follow the Hugo install steps for your OS: Quick Start - Install Hugo
2. In the terminal, browse to the Hugo site directory or use this example repo locally.
Start Hugo in the site folder (with a flag to serve draft pages): hugo server -D
4. Setting up Cloud Build for Hugo Extended
Updated
The newest community builder uses the hugo-extended package so this has been updated. (20/05/2020)
We'll be adapting the hugo image from the Cloud Community Builders Repo: Github - Cloud Builders Community
a. Clone locally to your machine
$ git clone https://github.com/GoogleCloudPlatform/cloud-builders-community
d. Build the Docker image
    $ cd hugo
    $ gcloud builds submit --config cloudbuild.yaml .
e. View the image in Google Container Registry
$ gcloud container images list --filter hugo
You can also see it from your google container registry page:
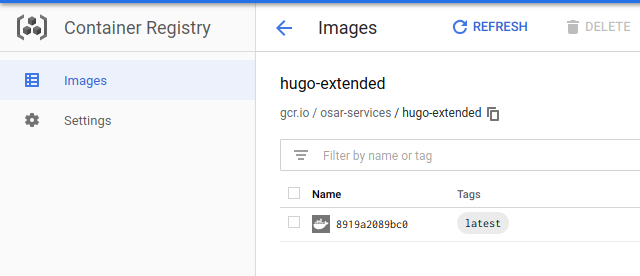
Containers Registry Page
Okay! It's uploaded ready to be used as a build step.
5. Deploying to your bucket with Cloud Build
To build remotely we will need to have a git repo for your Hugo site, I've used Google Cloud because it's easiest and free for up-to 5 users.
We need to add a build trigger for when you commit a code change to your site. I've set this up to always build the site from master, you can do different.
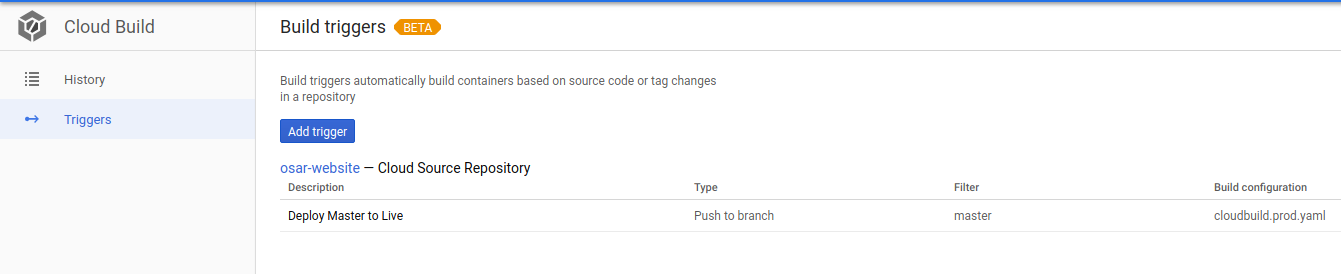
Build Triggers Page
Example Build Config
If you cloned the demo repo, this should already be in your project, but if not then here is an example config for you to automatically build and deploy your site to a Google bucket.
Add this file to the root of your project and push to your repo, change only the bucket name, the other variables will be replaced by Cloud Build.
6. (Optional) Setting up Cloudflare HTTPS for Google Bucket Sites
Correctly configuring a bucket requires using cloudflare (See: https://cloud.google.com/storage/docs/troubleshooting#https)
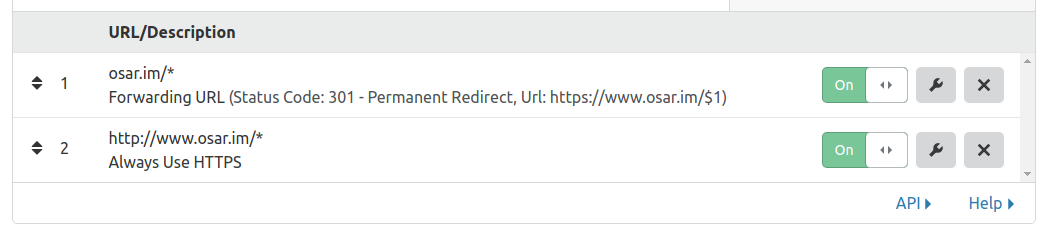
Setting up Cloudflare is fairly straight forward, you'll just need to make sure to enter the two CNAME records:

Cloudflare DNS Entries
And redirect within the Page Rules tab: